The Sunlight Map: Three Checks Before Choosing a Border
A sunlight map shows how sun and shade move across a border, helping you choose plants that suit its real conditions rather than a quick impression.
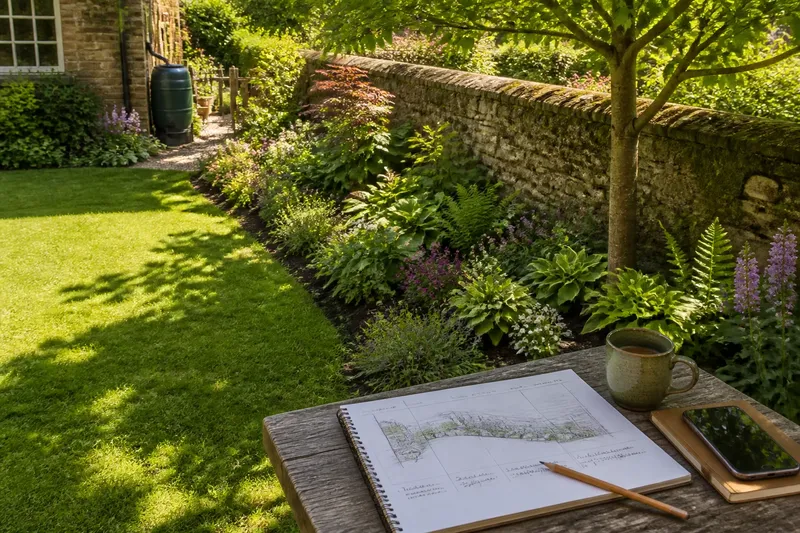
The common mistake with a new border is to judge its light from one sunny afternoon. That can leave you with plants suited to a bright spot that spends much of the day under shade, or with a shade border that bakes once the sun moves round. A simple sunlight map records when the light reaches each part of the ground, so you can choose planting for the conditions it actually gets.
You do not need specialist equipment. A notebook, a pencil and a few visits at useful times will do; a phone photograph can help you remember where shadows fell. The aim is not to measure sunlight with laboratory precision. It is to see the pattern well enough to avoid designing a border around a passing glimpse.
Mark the border before judging its light
Start by sketching the border as it sits in the garden. Show its outline, nearby walls, fences, sheds, trees and any taller planting that could cast shade. Add a simple compass direction if you know it, or mark where the sun rises and sets from your usual viewpoint. The drawing only needs enough detail to make observations easy to place.
Divide the border into a few sections, such as the end beside the house, the middle and the part near a tree. A long border may need more divisions; a small one may need fewer. Do not make a grid so elaborate that keeping it updated becomes the main garden activity.
Choose a period when the garden’s foliage and surrounding structures resemble the conditions you expect plants to face. A deciduous tree casts a different shadow when it is in leaf, while bare branches can let more light through. If you are planning for a season with a markedly different canopy, note that distinction rather than treating one observation as the whole year.
Record the date and the weather alongside each visit. Bright sunshine makes the edge of a shadow easier to see than a uniformly overcast sky. If clouds interrupt an observation, mark it as unclear instead of turning a guess into a neat-looking fact.
Check the moving shadows at useful times
Visit the border in the morning, around the middle of the day and later in the afternoon. Exact clock times matter less than spreading the visits across the period when the garden is lit. At each visit, mark which sections receive direct sun, which sit in open shade and which are shaded by a solid obstacle.
Direct sun means the sun reaches the ground without a barrier. Open shade is light filtered by something like a high tree canopy, while shade beside a wall or fence may be much darker. These distinctions matter: “shady” can describe anything from dappled light to a corner that receives very little daylight.
Draw the shadow line on the sketch, or use short notes such as “sun at front edge, shade behind the apple tree”. If a shadow falls across only part of a section, show that boundary. A rough map that records a clear change is more useful than a confident label that hides it.
- At the first visit, note which sections are already in direct sun and where shade remains.
- At the middle visit, check whether the sun reaches areas that were shaded earlier.
- At the later visit, see which parts lose direct light first and which retain it.
- After cloud or rain, return on a clearer day if the shadow pattern was difficult to read.
Say you have a border beside a garden wall and a small tree. On a clear day, you mark the wall end as shaded in the morning, sunny around midday and shaded again later, while the tree end stays dappled. The expected result of repeating the check is a map that separates a short sunny window from a consistently filtered patch, giving you a more useful basis for choosing plants than the phrase “mostly sunny”.
Read the map as a pattern, not a label
Compare the notes section by section. Look for where direct sun lasts longest, where it arrives only briefly and where shade remains through most of the day. The border may not have one light condition at all. A single sunny strip at the front can sit beside deeper shade near a fence, and those areas need not share the same planting plan.
Notice what causes each shadow. A wall tends to create a stable boundary; a tree canopy can produce moving, dappled shade; a neighbouring building may block light only during part of the day. That distinction helps explain whether the pattern is likely to be consistent or to vary with foliage and season.
Do not turn a rough map into a claim about the exact number of hours of sun. For choosing a border, the practical question is whether a particular area gets prolonged direct light, a shorter sunny spell or mostly filtered light. Plant labels often describe preferences in broad terms, so the map is a way to compare those terms with your own plot.
Match the border to plants without overpromising
Use the map to divide the border into planting zones. Put plants described as needing full sun where your observations show the longest direct exposure. Consider plants suited to partial shade where the sun reaches the ground for only part of the day, and look for shade-tolerant choices in areas that remain shaded. These are starting points, not rigid categories: a plant’s tolerance can also depend on soil, moisture and local conditions.
Read the label or supplier’s description for each plant, especially where it specifies a preference for morning sun, afternoon shade or protection from strong sun. If the wording is broad, compare it with the light pattern you recorded and choose a plant whose needs appear compatible. Where the right choice depends on a label, manufacturer instructions or local rules, follow those directions.
It is not worth trying to record every passing cloud or tracing shadow edges to the inch. Those details change constantly and rarely improve a planting decision. Spend the effort on repeated observations at useful times and on separating genuinely different parts of the border.
How should you handle awkward light patterns?
What if a border gets morning sun and afternoon shade?
Record that pattern plainly rather than calling the whole border sunny or shady. Then compare it with the preferences on plant labels, since some plants suit that arrangement better than others.
How often should you check the sunlight map?
Repeat the observations if your first set was made under cloudy conditions or before a nearby tree came into leaf. A second clear-day check can show whether the initial map captured the pattern you need for the planting decision.
Can phone photographs replace written notes?
Photographs can preserve the visible shadow line, particularly if you take them from the same viewpoint. Add a short note about the time and which part of the border is shown, or the images may become a gallery of unidentified shade.
What if one section changes from sun to shade?
Mark the transition rather than forcing the section into a single category. You can then place plants according to the part of the ground they will occupy, or keep the border’s planting flexible until the pattern is clearer.
Use the map to make one planting decision
Before buying plants, write a short description for each section: for example, “direct sun later in the day”, “bright dappled shade” or “shade beside the fence”. Keep the wording tied to what you observed. This makes it easier to compare plant labels without asking one plant to suit the entire border.
If the light boundary crosses a proposed planting area, adjust the layout so plants with similar preferences sit together. There is no need to draw a formal garden plan; a few marks on your original sketch can show where the change occurs. For a mixed border, that small distinction can prevent a sunny-edge choice from being repeated in the darker corner.
A sunlight map is most useful when it stays modest: a clear record of where the sun reaches, when shade arrives and what causes it. Use it as the basis for choosing plants, then leave room for the garden’s other conditions to matter too. The phrase “sunlight map” should prompt a real observation, not an elaborate chart that nobody wants to update.